Visit Ukulele (Lesson #000) if you need a quick basic understanding of the Ukulele and some getting started basics.
Before starting, grab you ukulele, have it in tune (Visit Ukulele (Lesson #000) if you need to know how to tune your ukulele) , and here's my Lesson #001.
Lesson #001
CHORDS
Introduction
Chords are sometimes depicted in the form of Chord Boxes which corresponds to the Ukulele's fret's per the below comparison diagram. ZERO indicates the positioning at the NUT or the tuned strings. The fret count could sometimes goes up to 18 or sometimes more depending on the ukulele sizes. |
| Frets vs Chord Boxes |
When it is played at higher frets, the chord boxes are depicted as below or of other fret numbers.
 |
| Higher Frets |
Essential Chords to Jump Start
Here are the 10 essential chords which my instructor gave me during the first class for a jump start. For a starter, use the below attached chart as a guide. I find it that the numbering and color coded for the finger on fretting helps to further differentiate and makes it identifiable comparing to the black dots only. Well for a beginner without music knowledge, this is good.Use following steps as a practice exercise. Start with step#1. Once able to repeat smoothly, move on to step#2 then so on.
Use down strum only. You can begin with 8 strums for each note. After that switch to 4 strums for each note. You can also use the alternate strums which I've put up in after this section.
Step#1: C - F - G
Step#2: C - F - G - C - Am - A
Step#2: C - F - G - C - Am - A - A7 - G7
Step#4: C - F - G - C - Am - A - A7 - G7 - Em - C
Step#5: C - F - G - C - Am - A - A7 - G7 - D - Em - D7 - C
Note: For the D7 chord, in the below illustration, you put the index finger across the second fret (this is called a bar) and ring finger on 1st string 3rd fret. Your middle finger shall assist the index finger to bar the chords firmly so that it is played right.
 |
| 10 Essential Chords to Jump Start |
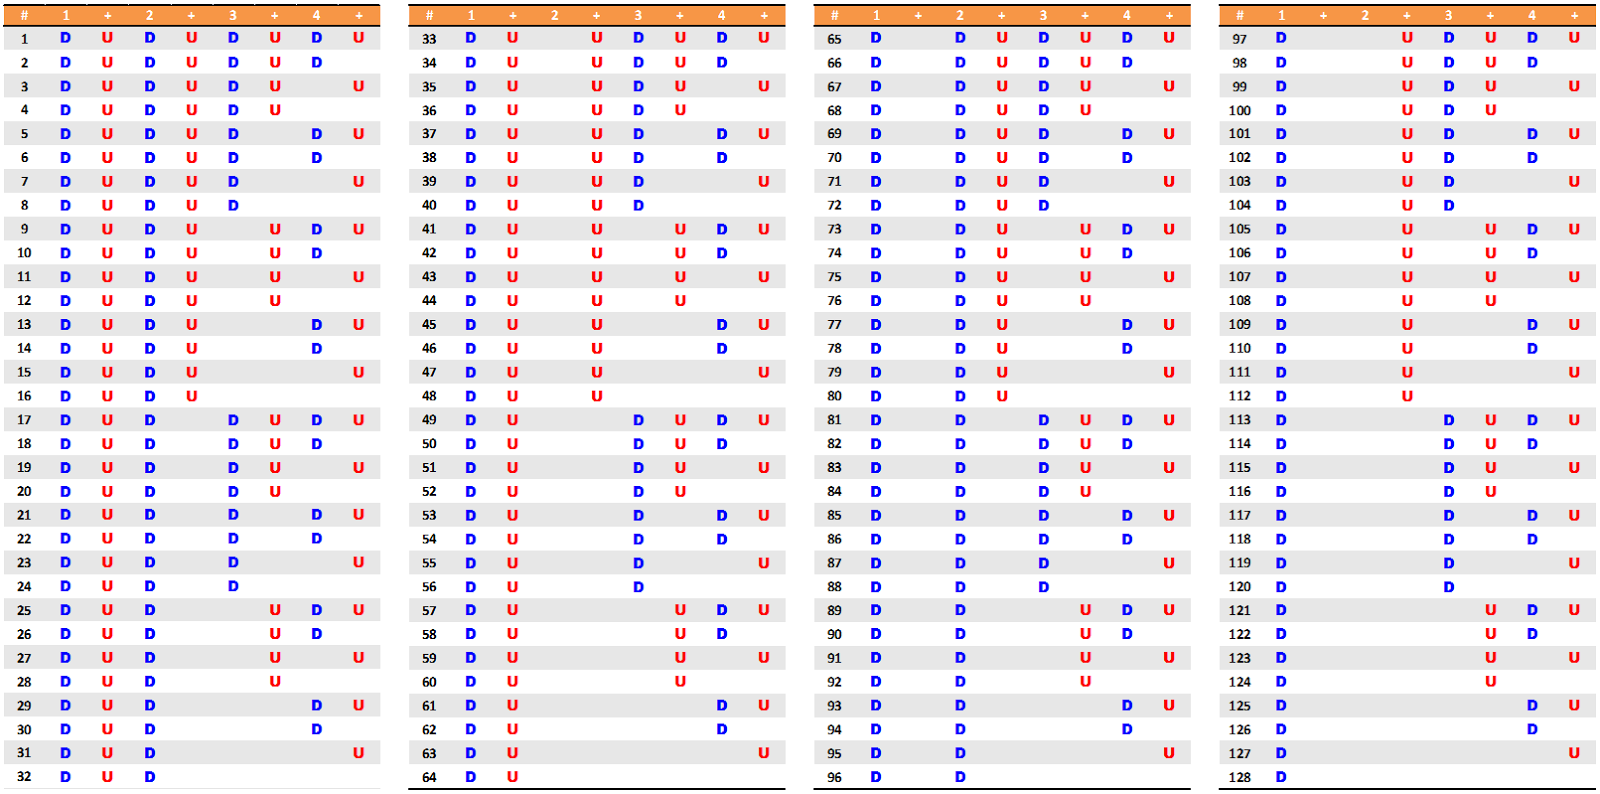
Strumming Patterns
There are hundreds of strumming patterns available based on the tempo, timing, type of music to be played, etc.I'll be illustrating down (D) and up (U) instead of arrows and with 4/4 timing for a single measure in the below table. It's arranged based on sequence of permutations.
Do take note that some tabs uses arrows, arrow up means you strum downwards and vice versa. This is so as it is following the tablature, which is arranges from string 1 to 4 (AECG) so in order to strum down the arrows pointing in tablatures is going to be pointing up.

Here are some different types of strums available on different timing and measures.

In the end Practice Makes Perfect and Enjoy!
Comments
Post a Comment